A Quick Guide to complete the Facebook Business Verification Process


You must have a Facebook Business Manager Account before you get started.
In case you do not have a Facebook Business Manager Account, you can create one by visiting the following page – https://business.facebook.com/create
Now, let’s see how you can complete Facebook Business Verification in 6 simple steps.
Step 1: Go to Facebook Business Manager (https://business.facebook.com)
Step 2: Click on ‘Business Settings’ option which can be found on the left side of the page.
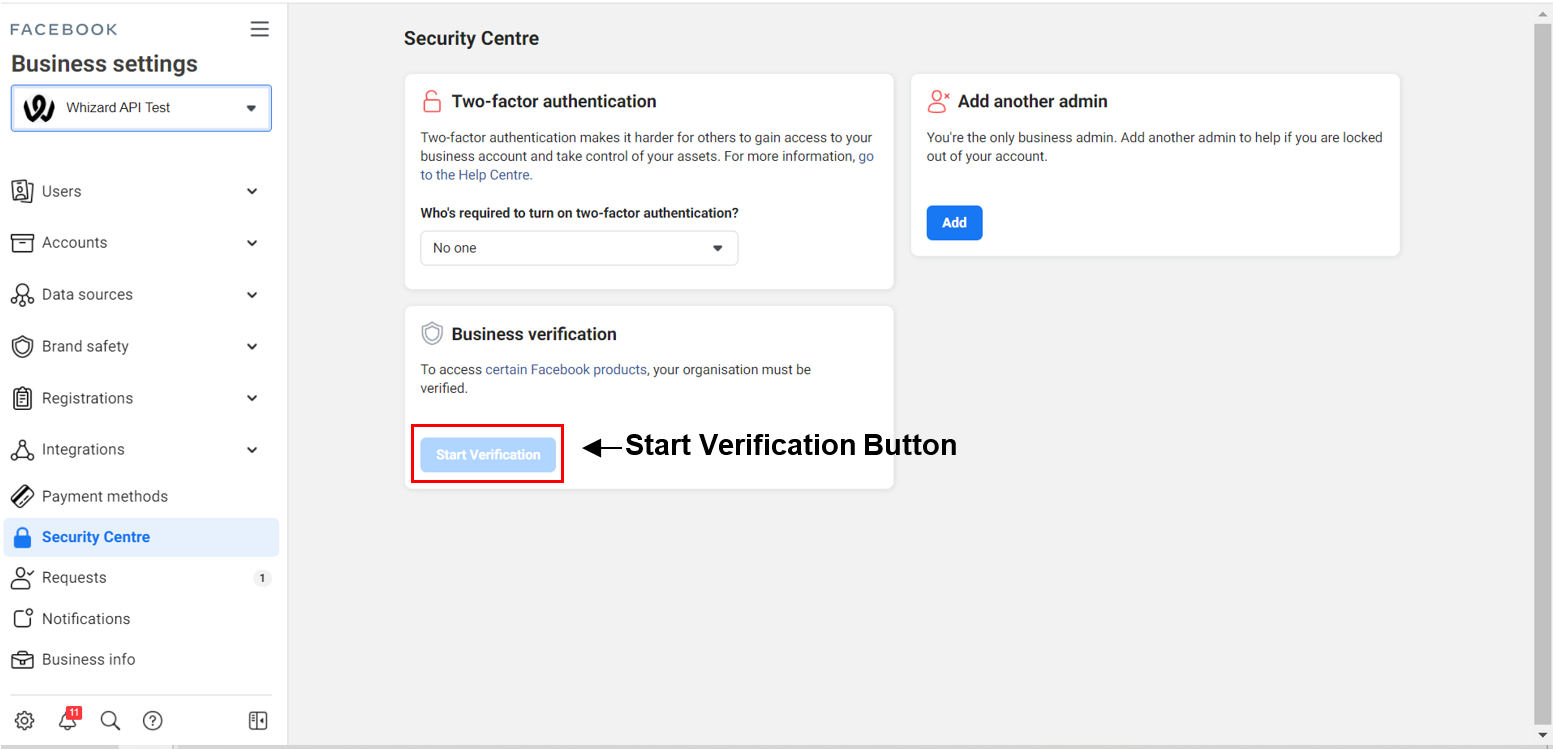
Step 3: In the ‘Business Settings’ column, you’ll find ‘Security Centre’ as shown in the screenshot below:-

Step 4: Click on the ‘Start Verification’ button in the “Business Verification” Box
Note: If the ‘Start Verification’ button is greyed/disabled (like the image above), you must follow a few additional steps to enable it. Do read the quick guide to enable “Start Verification” button.
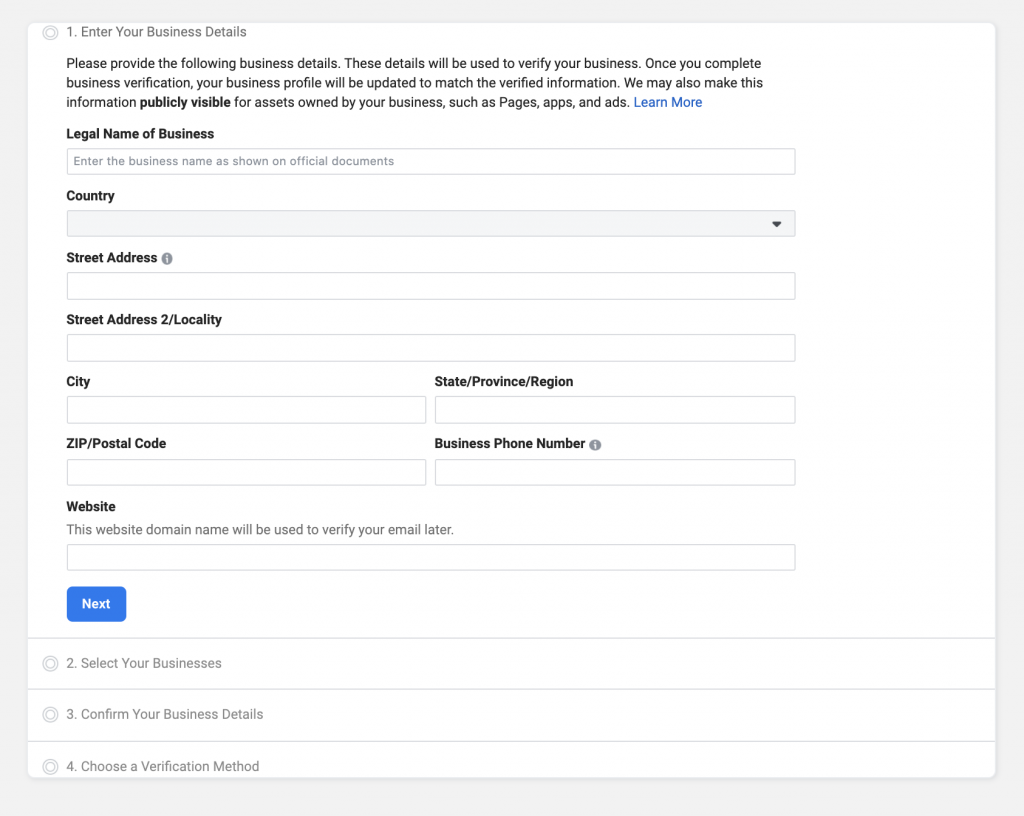
Step 5: Fill in your Business Details on the form presented as shown below: –

Step 6: Upload all the necessary documents. The list of accepted documents shall be displayed depending upon the country of application. Also, you would need to verify your domain as per the mentioned process to complete the application. You’ll be notified once you have successfully submitted the application.

