Verifying Facebook Business Manager (FBM) accounts is highly integral in the activation of the array of functionalities made available by the WhatsApp Business API. It confirms the legitimacy of your business, thereby allowing you to access advanced features. This article presents a step-by-step guide to verifying the Facebook Business Manager account through Whizard API.
Prerequisites for Facebook Business Manager Verification
Before the start of the verification, make sure that you have the following:
Legal Business Information
- Give accurate business name, address, and contact information.
Business Documentation
- Send legal documents (GST certificate, bank statement, or business license) showing the legal business name and address.
- Make sure documents are clear, colored, and entirely visible.
Business Website
- The website must show the exact legal business name in the footer that matches the name on your documents.
Proof of Business Access
- Provide a business email address ([email protected]) matching your website domain.
Step-by-Step Procedure for Verification of FBM Account
Step 1: Login to Facebook Business Manager
- Open Facebook Business Manager on your browser.
- Log in with your Access Id and Password.
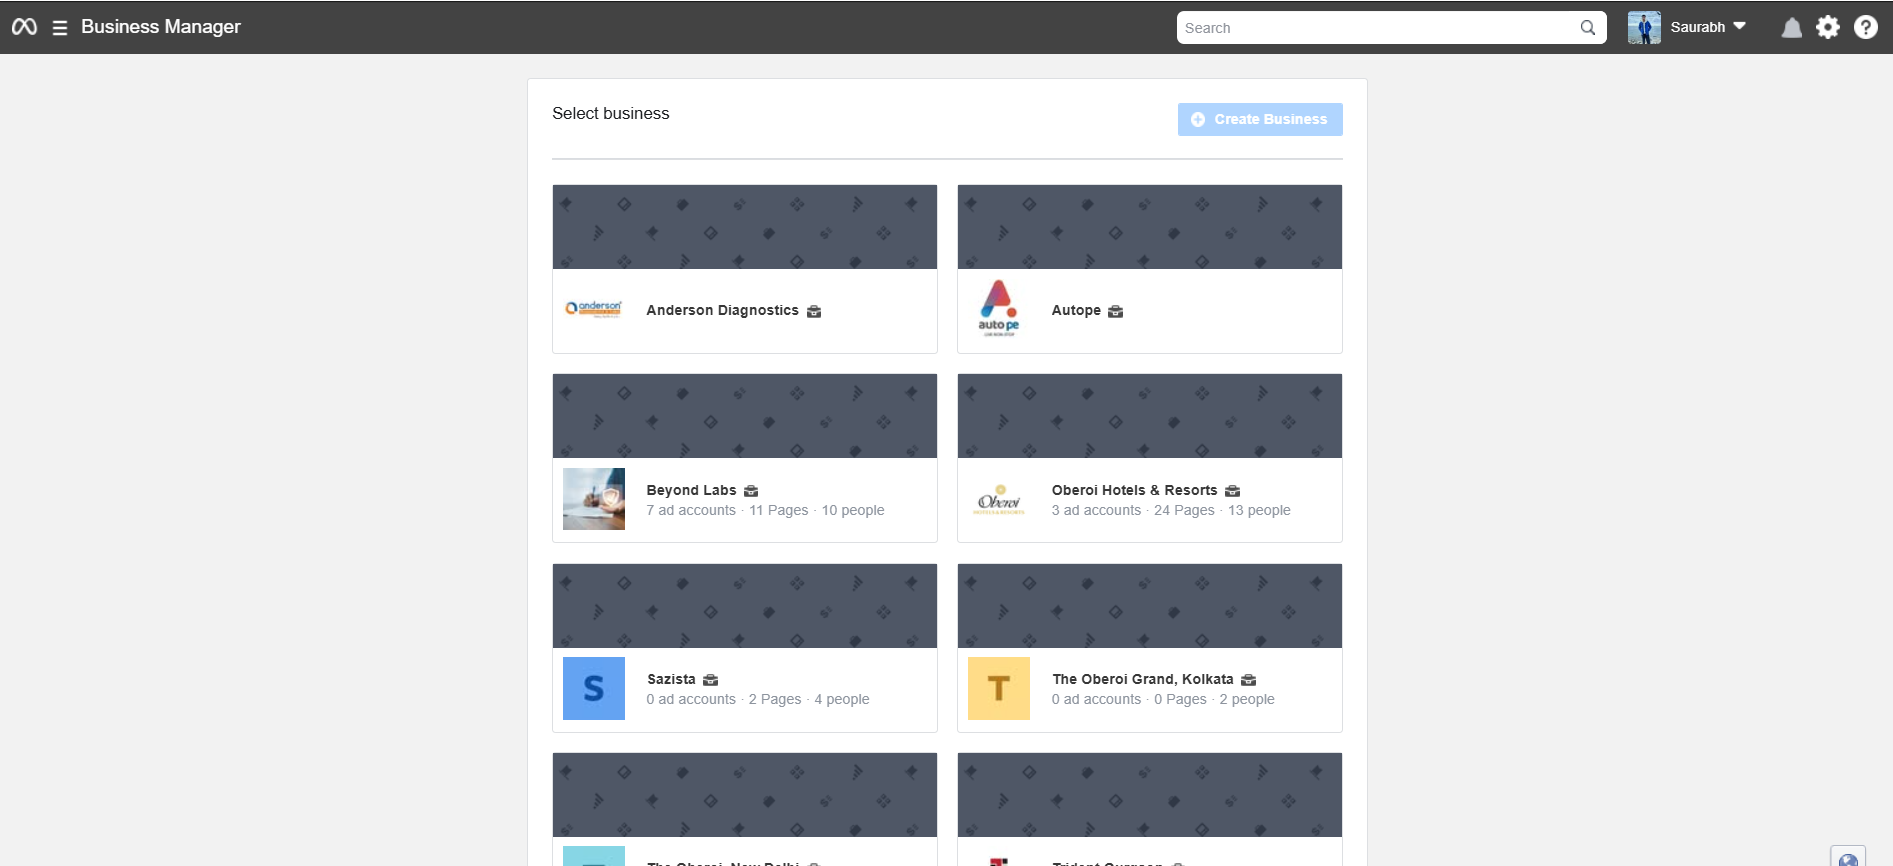

Step 2: Select/ Create Business Manager Account
- Choose a Business Manager if the Account already exists.
If not, create a new one by clicking on Create Account and proceeding with the prompts.
Step 3: Go to Security Center
- After opening Facebook Business Manager go to Business Settings.
- Click on Security Center on the left menu.
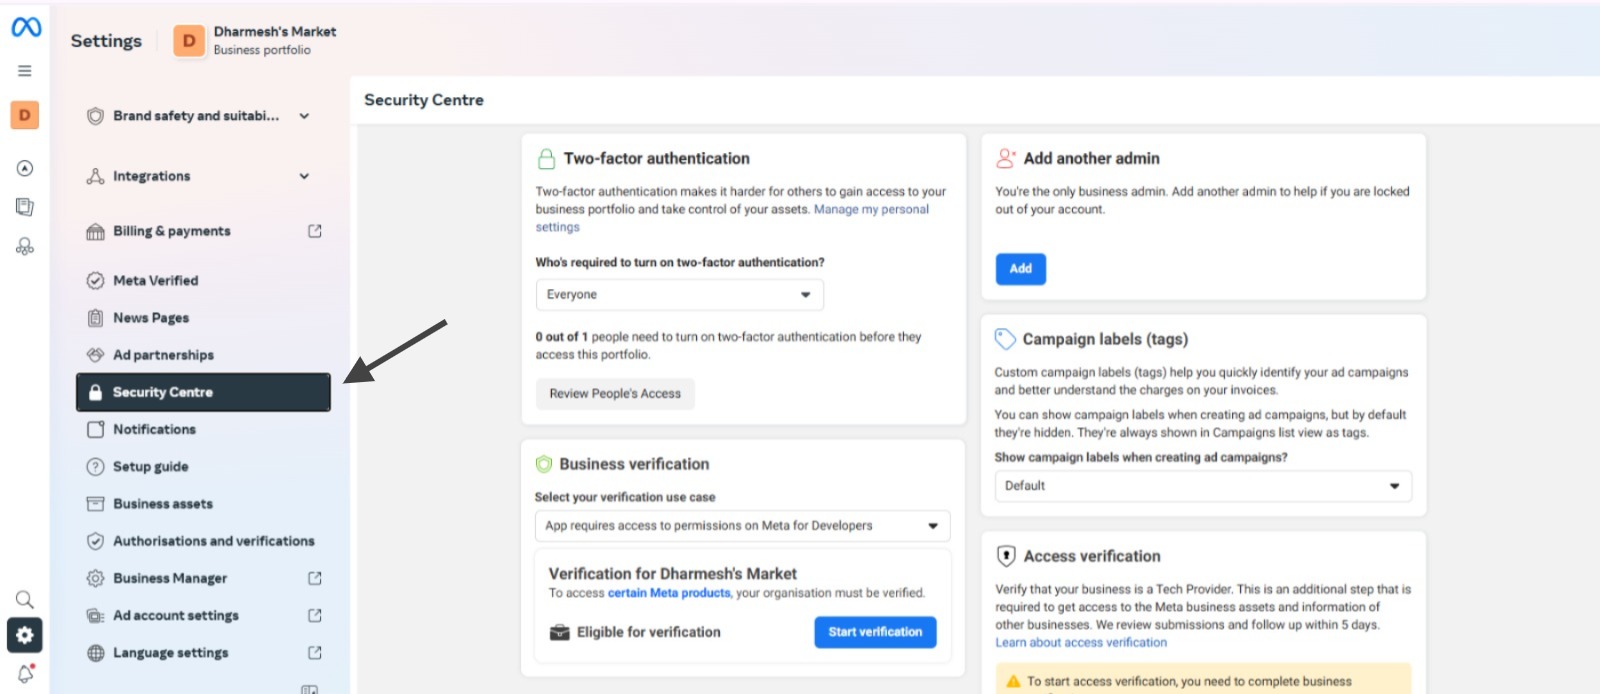
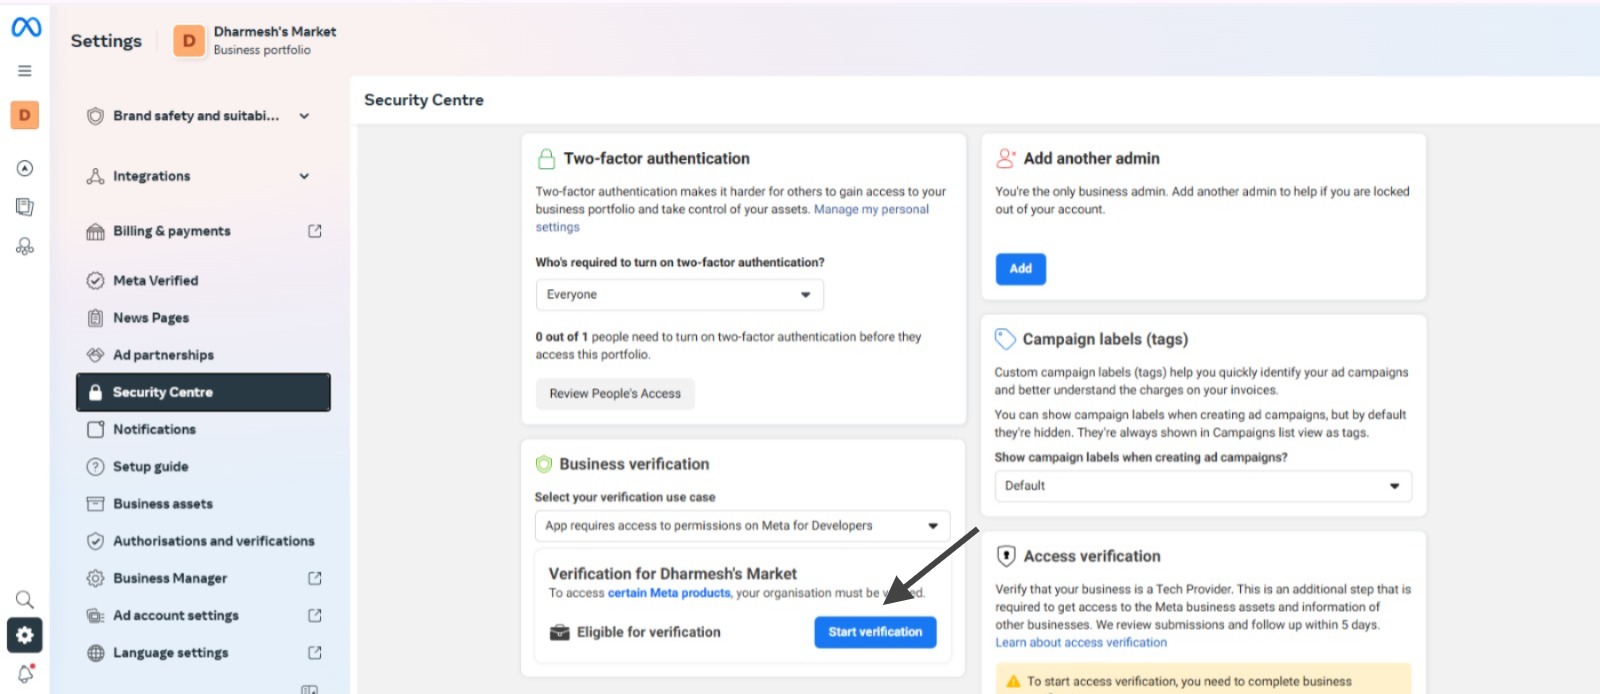
Step 4: Pull Verification
- Click on Start Verification on the Security Center page.
- If greyed out, ensure that you meet every single requirement within the boundaries of your account LINK (proving administrator access, completely fulfilling business details).
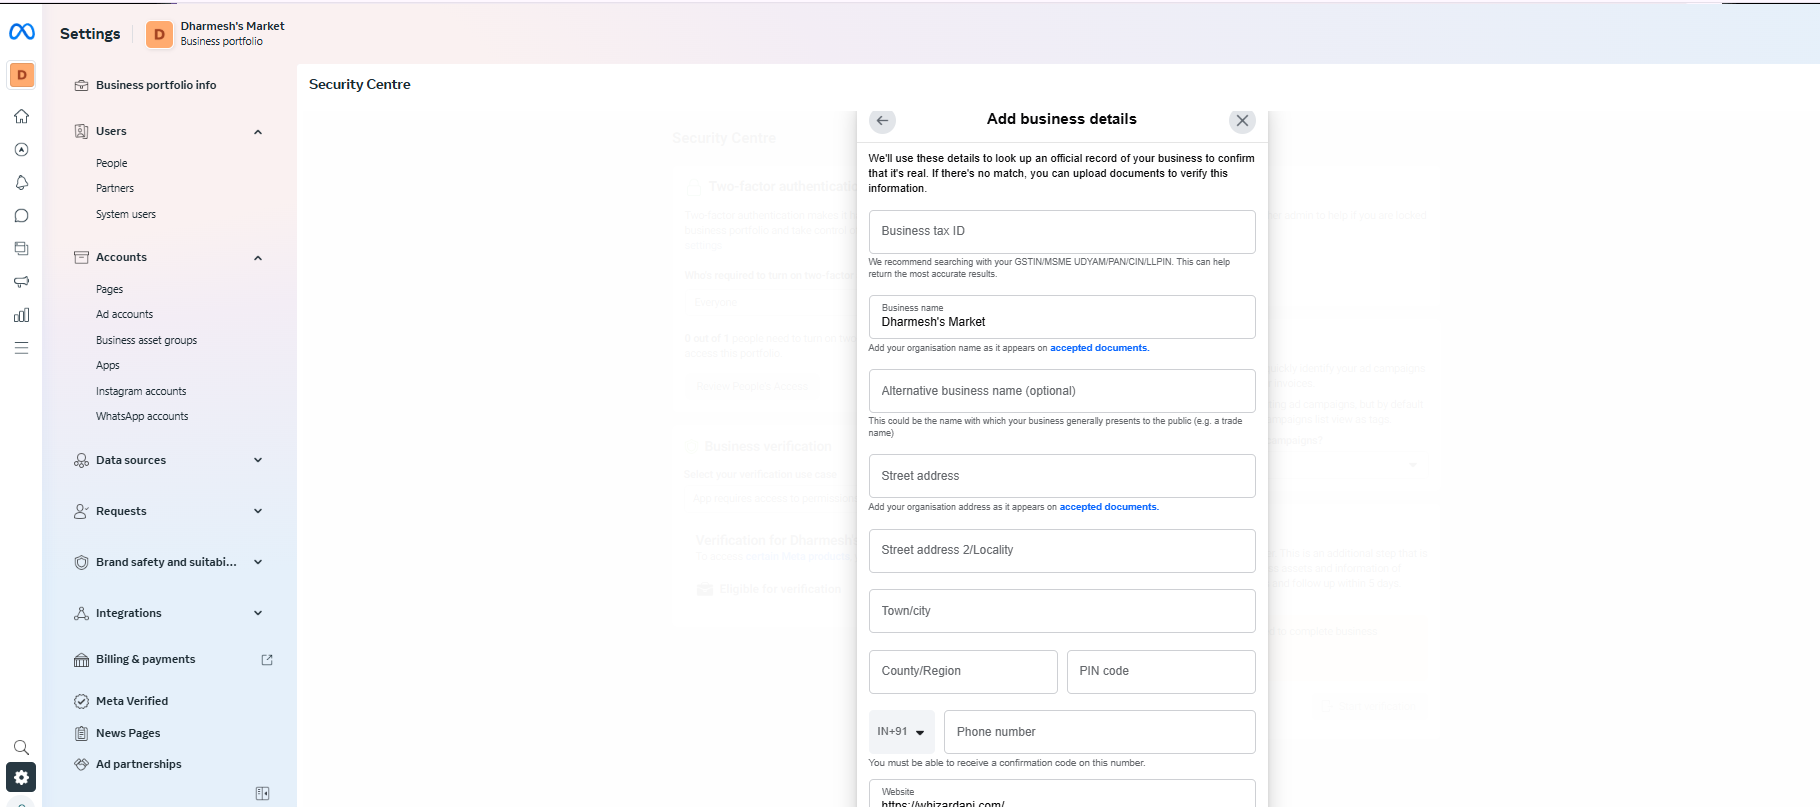
Step 5: Fill the Business Details
Select Country:
- Choose the country where your business is legally registered.
Organization Details:
- Enter your exact legal business name as typed in your documents.
- Provide the legal business address (this must match your documents).
- Add your business website URL (this must indicate your legal name in the footer).
Step 6: Choose Your Business or Select “Organization Not Listed”
- Facebook will undertake to search for your business on the basis of the information supplied.
- If it finds your business, select it.
- if it doesn’t find your business, click on Organization Not Listed and continue.
Step 7: Upload Supporting Documents
- Upload clear color copies of your legal business documents (such as GST certificate, bank statement, business license).
- Ensure that the documents are in line with the details you have provided above.

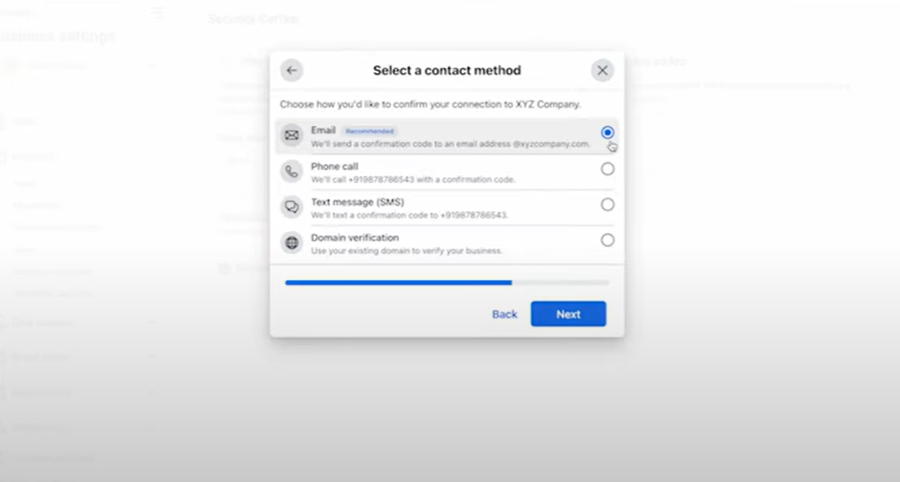
Step 8: Choose a Verification Method
- Select email (recommended) or phone for verification.
- If it is through email, then provide an official business email address (like [email protected]).
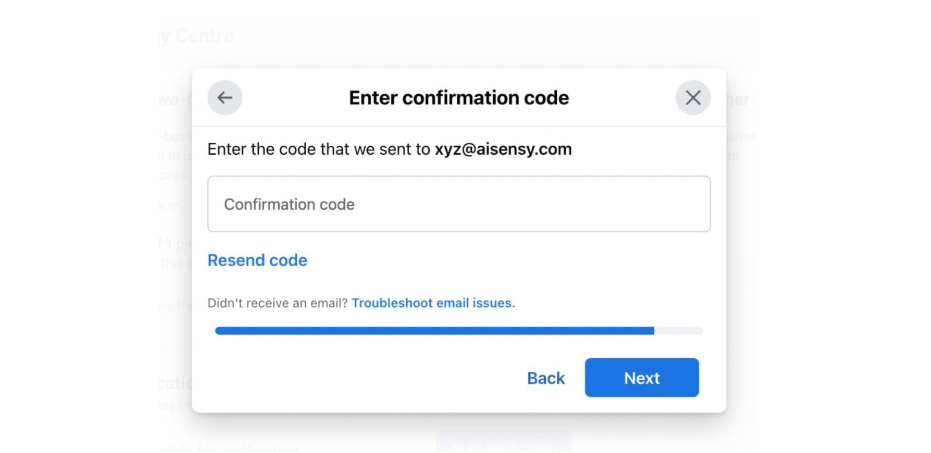
Step 9: Confirm the Code
- Facebook will send the verification code to your selected contact method.
- Verify the code to successfully finish verifying.
Why Verify with Whizard API?
Once your Facebook Business Manager account is verified, you can seamlessly apply for WhatsApp Business API with Whizard API. Here’s why you should choose Whizard API:
- Official WhatsApp Business API Partner
- Trusted and reliable service for businesses of all sizes.
- Fast Approval
- Get approved for WhatsApp Business API in as little as 10 minutes.
- Unmatched Support
- Dedicated assistance at every step of the process.
- Free WhatsApp Business API
- No hidden costs or setup fees.
- Exclusive Benefits
- Free WhatsApp conversation credits.
- Free Click-to-WhatsApp Ads Manager.
- Free verified blue tick application.
Ready to Get Started?
Transform your business communication with Whizard API and WhatsApp Business API.
👉 Get Started for FREE
👉 Book a Demo
Powered by Whizard API – Your Gateway to Seamless Business Communication.

